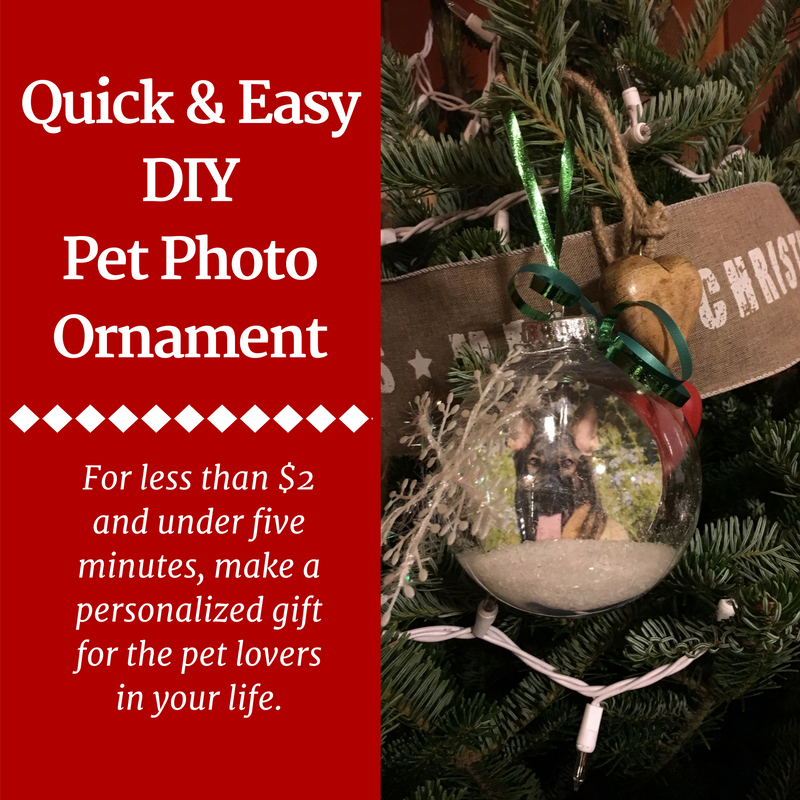
DIY pet photo ornament
An inexpensive, last-minute gift idea for fellow pet lovers or your pet-sitting clients!

If you are in need of a last-minute, inexpensive holiday gift idea for a pet-sitting client (or a fellow pet lover), this simple DIY pet photo ornament could be the perfect solution. All you need is a photo of the pet and a few additional supplies that can be found at your local dollar store.
Supplies needed:
- Clear, plastic ornament. The clear ornaments used for this project were purchased 2/ $1.
- Photo of the pet (2 copies). Ordering copies of the photo or printing it yourself on photo paper is ideal, but printing the photos on regular white printer paper works also!
- Scissors.
- Glue stick. As an alternative, double-side tape also works well.
- Clear packing tape.
- Additional “embellishments” (optional). See step five for ideas.
Step 1: Print and cut two copies of the pet photo. If you’d like the photo to fill up most of the space inside the clear ornament, you’ll want to cut the photos to a size slightly smaller than the circumference of the ornament.
 Quick tip: Find a glass or plastic drinking cup that your ornament can sit into, but only about 1/4 of the way into the cup. You can use this cup as a template to cut your pictures in a circle that will be slightly smaller than the circumference of the ornament.
Note: If you are making this ornament as a gift for a client, an alternative idea is to print only one photo of the pets, and then use your logo and a special message from your pet-sitting business as the second photo.
Step 2: Affix the two photos back to back. To do this, you can use double-side tape (if you have it) or a glue stick.
Step 3: Unless you just so happen to have a laminating machine handy, you can “laminate” the photos with clear packing tape. Use clear packing tape on the front and back of your photo, with the sticky sides toward each other. Then, trim the tape, leaving just a small border around the image.

Step 4: Gently roll the photo into a tube shape so you can slide it into the top opening of the ornament. Be gentle so you don’t permanently bend the photo. Once the photo is inside of the ornament, you can use a pencil, tweezers or any type of thin stick-like object if needed to unroll the photo.
Step 5: Put the top back on the ornament and make sure it is secure. If you do not want any additional embellishments on your ornament, your DIY pet photo ornament is now complete! However, including Epsom salt or white glitter inside the ornament as “snow” is a nice touch, and you may also want ribbon to tie at the top of the ornament.
If this is a client gift and you opted not to use your logo or company message for the backside of the photo in the ornament, applying some type of tag with your company logo and year to the ornament hook is a great idea!
 Important: If you want to add either Epsom salt or glitter in the ornament, using some type of funnel to pour it inside the ornament can help you avoid a big mess! Remember, to ensure the ornaments are out of pets' and childrens' reach if using Epsom salt to avoid ingestion. Another for "fake snow" could be small circles of paper.
Before gifting the DIY pet photo ornament, package it in a decorative box or simply wrap it in tissue paper tied with a ribbon bow at the top.
While the ornament is an inexpensive and quick project, it’s sure to be an appreciated keepsake that will be used year after year during the holiday season.
Do you have other favorite DIY gifts for pet-sitting clients or pet owners? Share your ideas (and link to tutorials) in the comments section below.


Comments
Pet Sitters International
Claudia Crawford